The Asus ROG Ally is one of the best gaming handheld devices, and recently, Asus brought gyroscope aiming to the system. I already went on and on about how the Ally is my new favorite gaming “laptop,” but additions like these are guaranteed to make me love the system more.
Gyroscope aiming is vital for gaming on a handheld, as any kind of shooter is a little unwieldy when stuck using nothing but joysticks. It’s a huge part of why I’ve avoided downloading any games from the genre during my time with the Ally, but now, I can experiment with gyroscope aiming in plenty of games.
How to use Asus ROG Ally gyro functionality
It’s not immediately obvious how to get the gyroscope working on the Ally, but if you’re running Armoury Crate version 1.4.5.0, it’s not at all difficult.
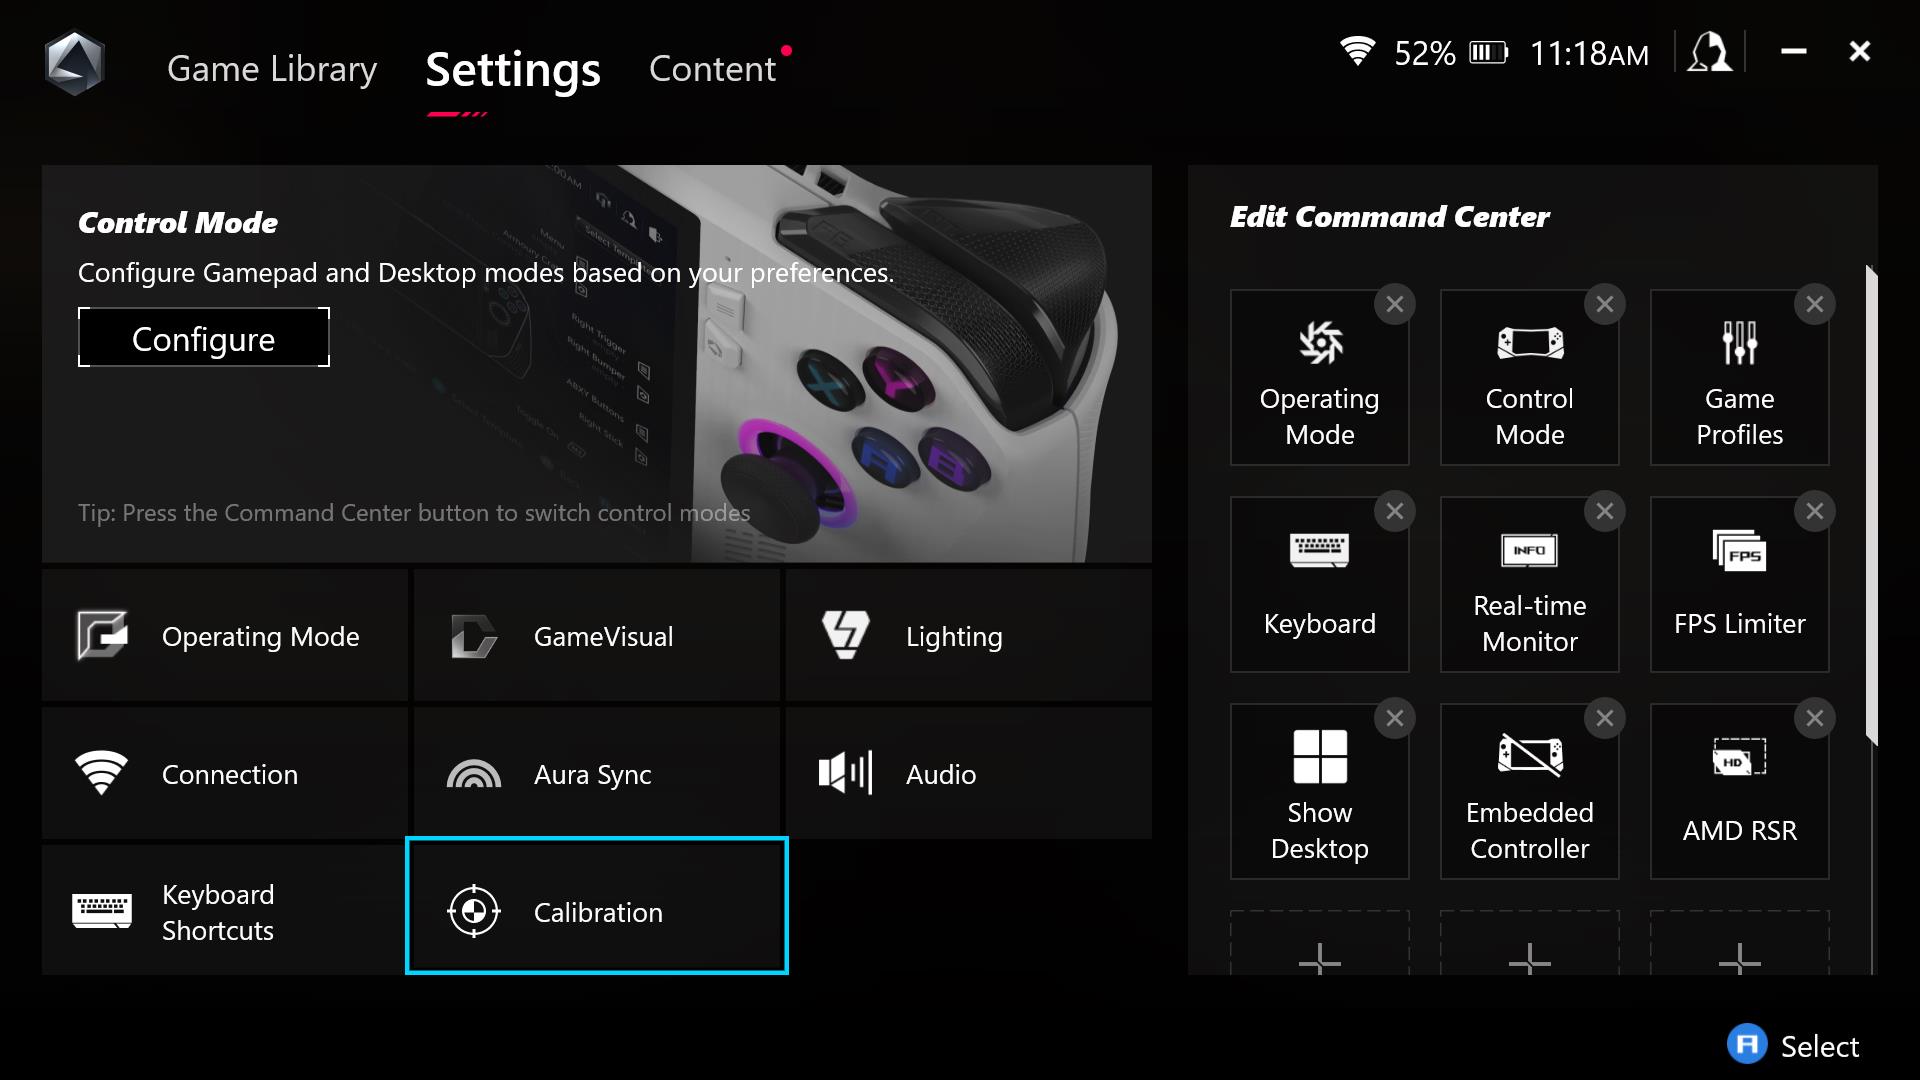
1. Open Armoury Crate. To quickly do this, press the Armoury Crate button, which is the lower menu button on the right. Select Settings at the top and open Calibration at the bottom.
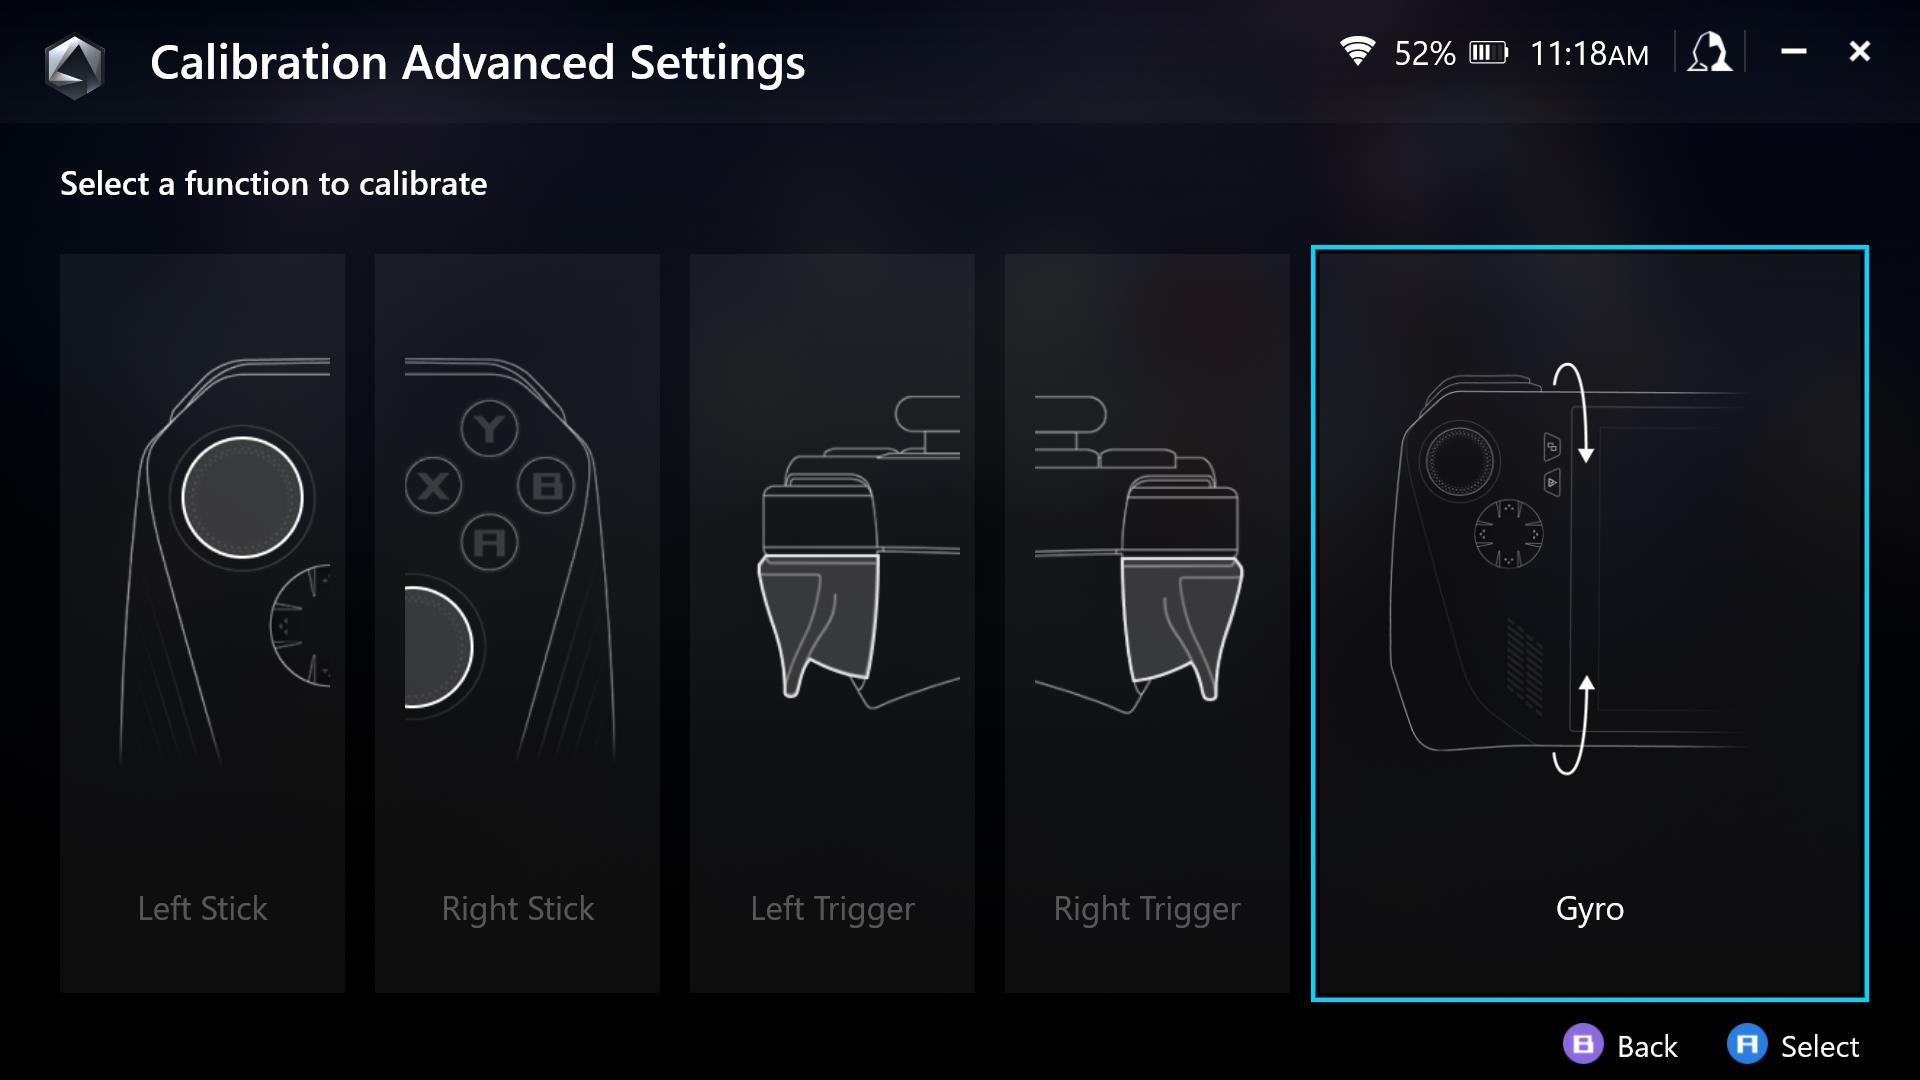
2. Scroll to the rightmost option and select Gyro.
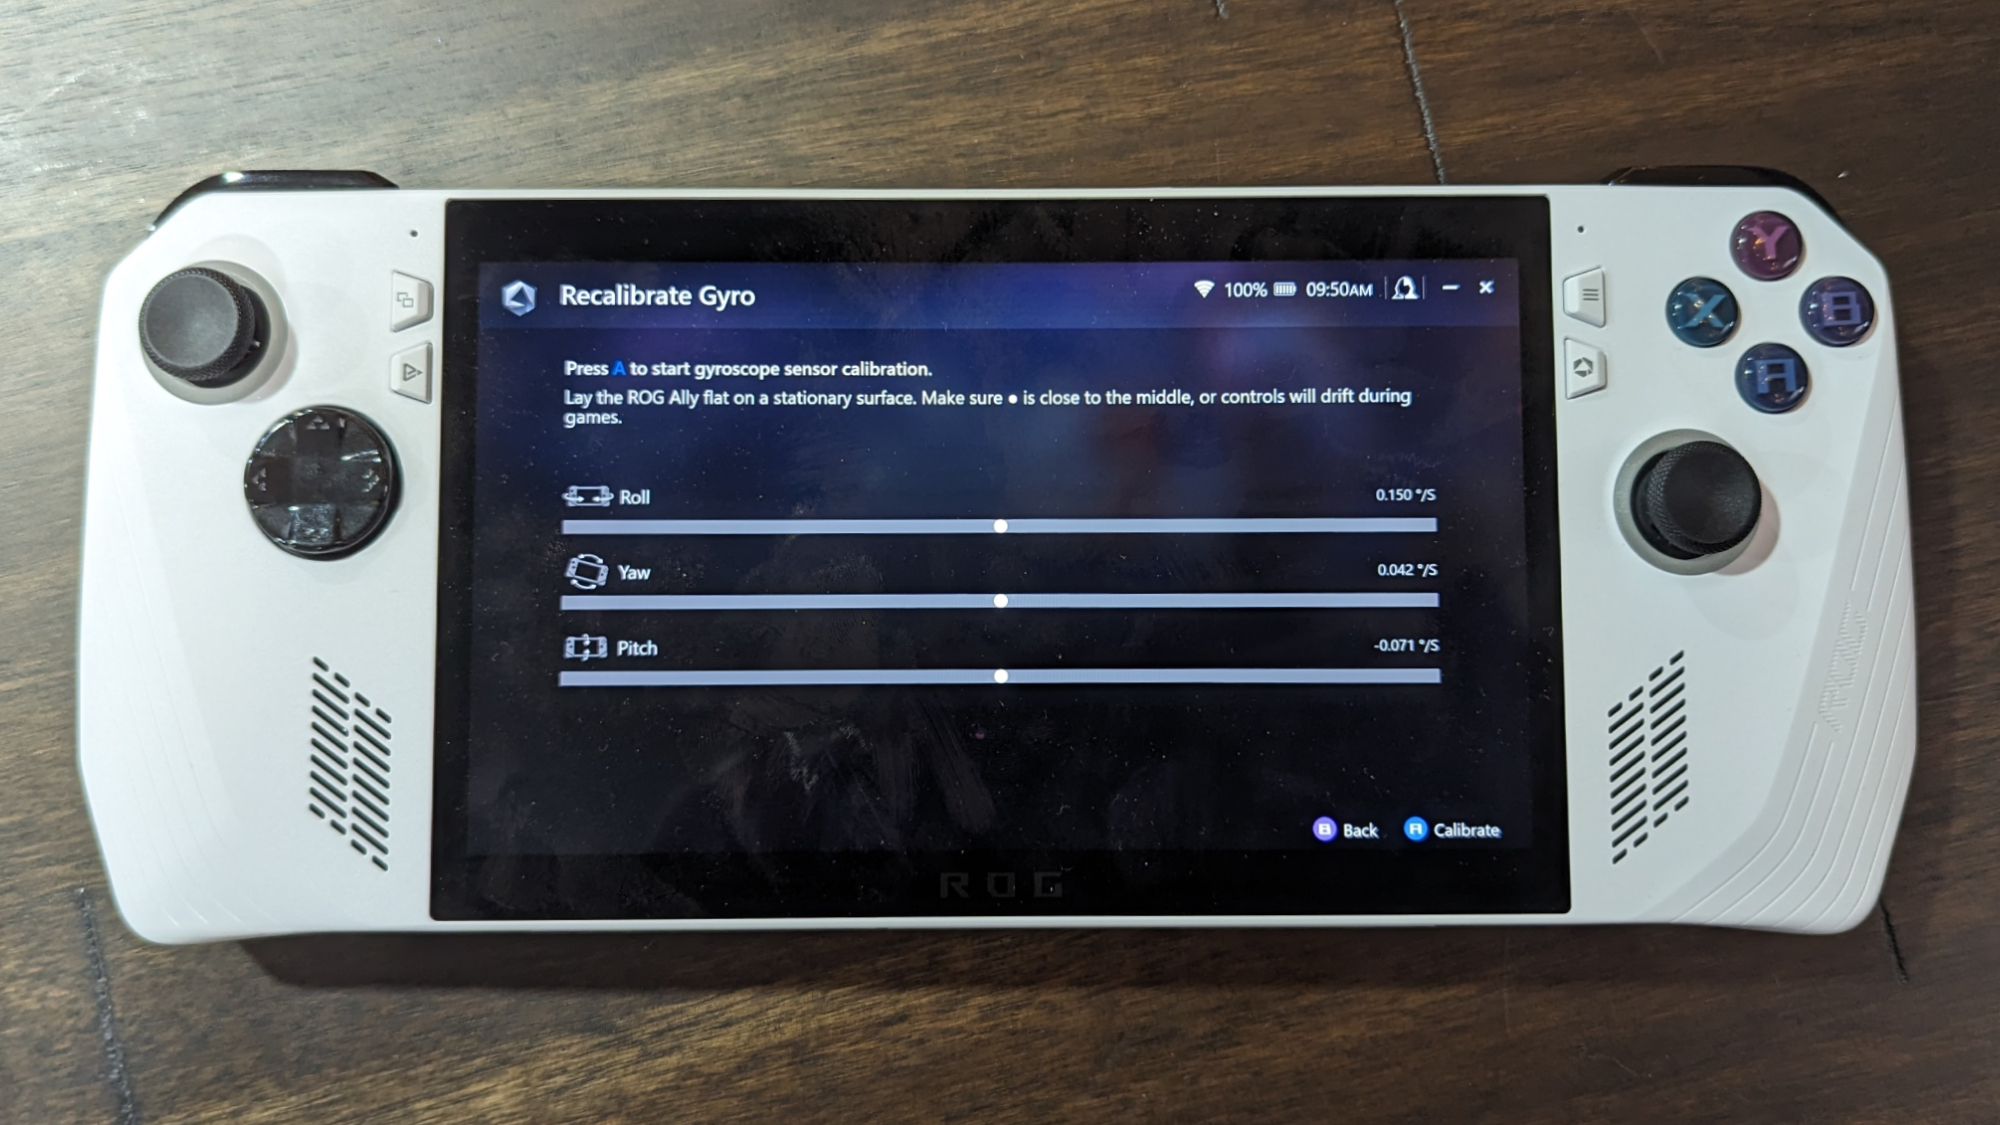
3. Lay your Asus ROG Ally on a flat surface. When all of the bars are perfectly centered (or as close as you can possibly get it), press A to begin calibration.
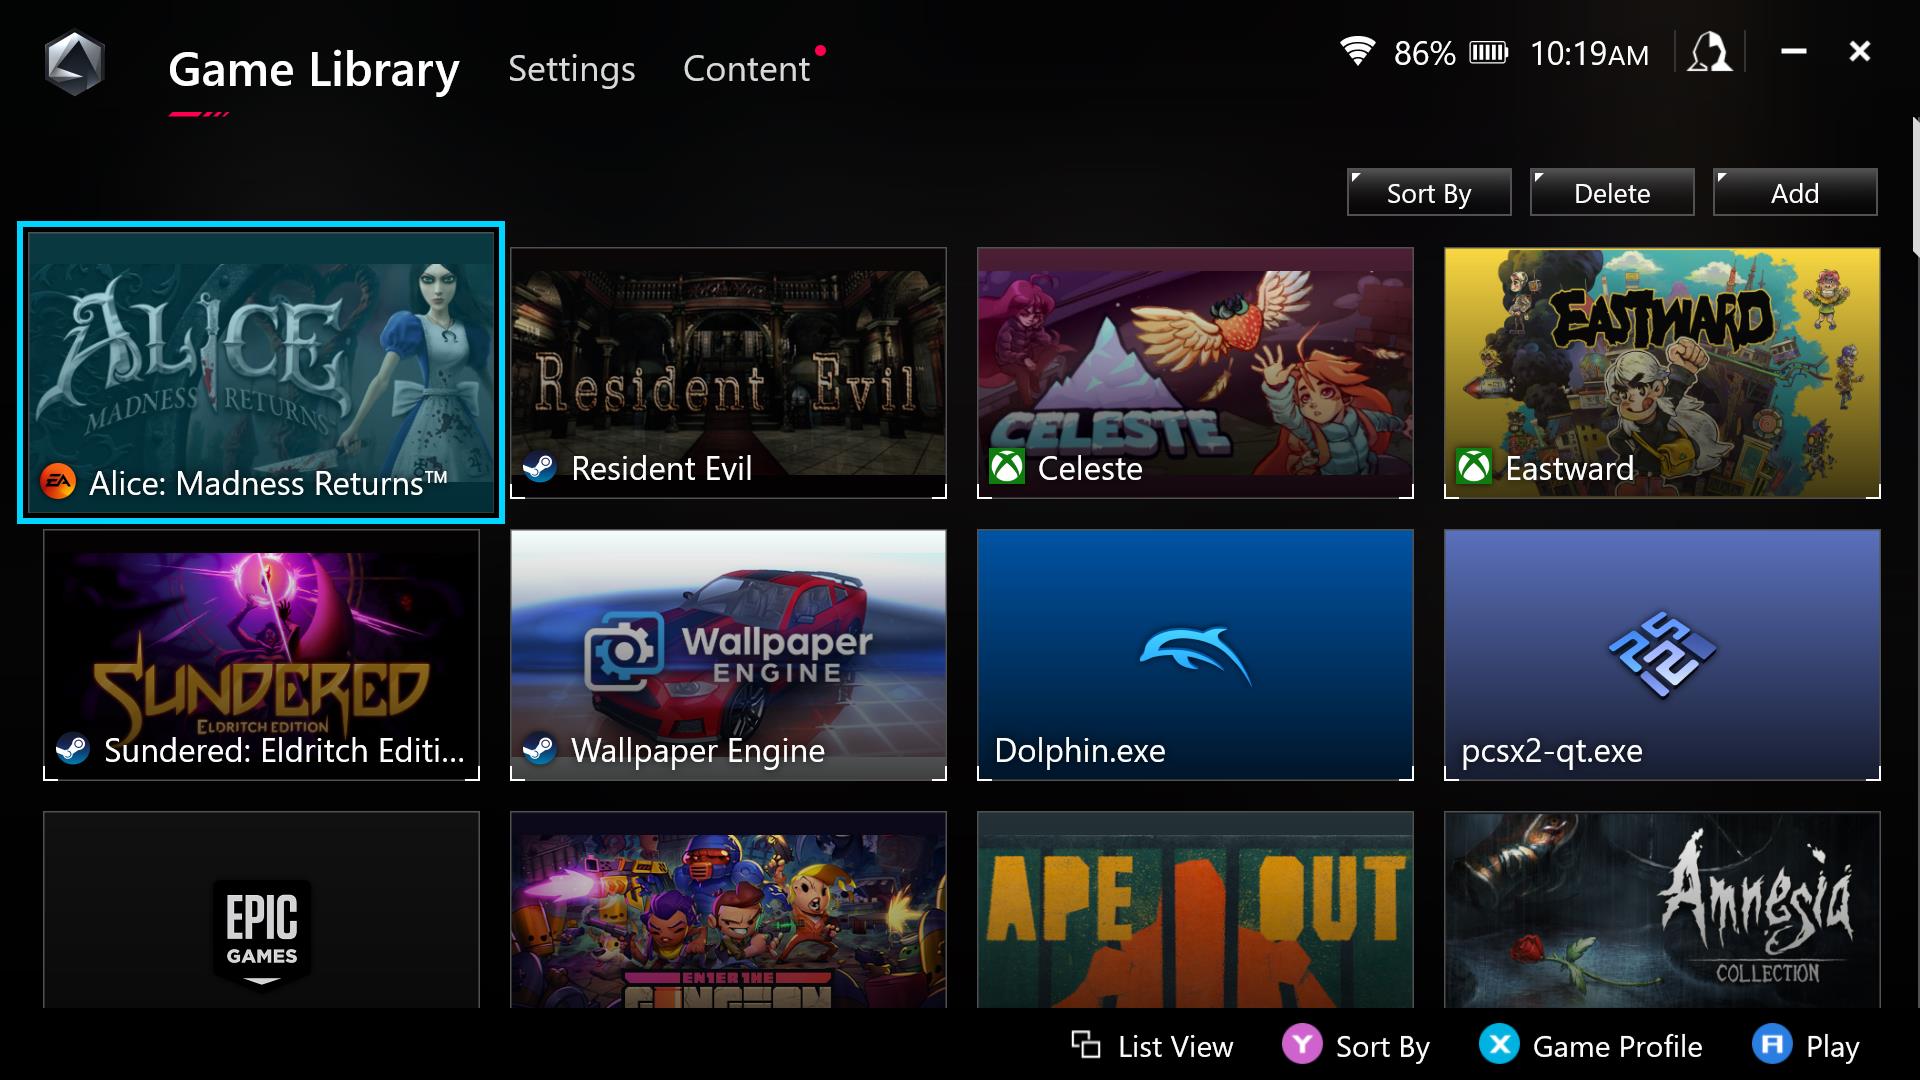
4. Return to your Game Library. Select the game you wish to use Gyro controls on and press X.
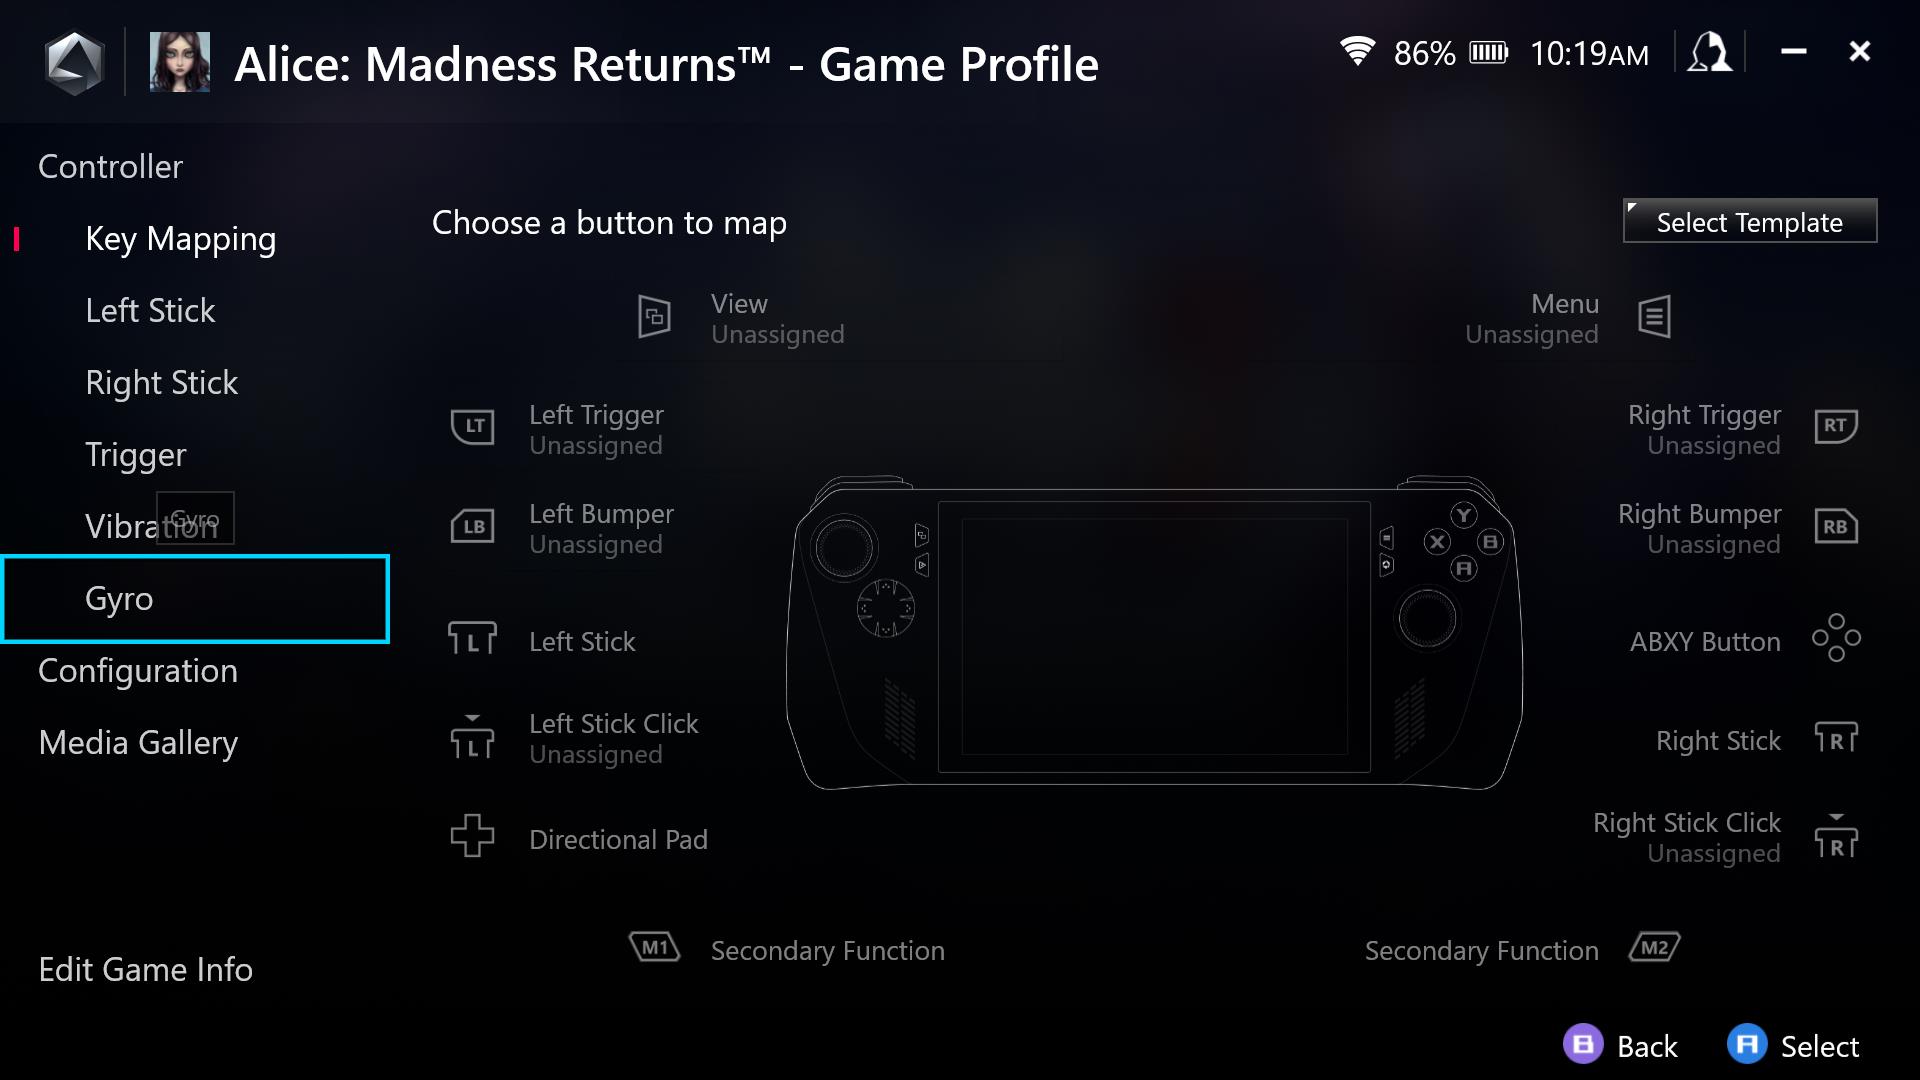
5. On the leftmost collection of menus, you’ll see Gyro. Scroll down to it and open it.
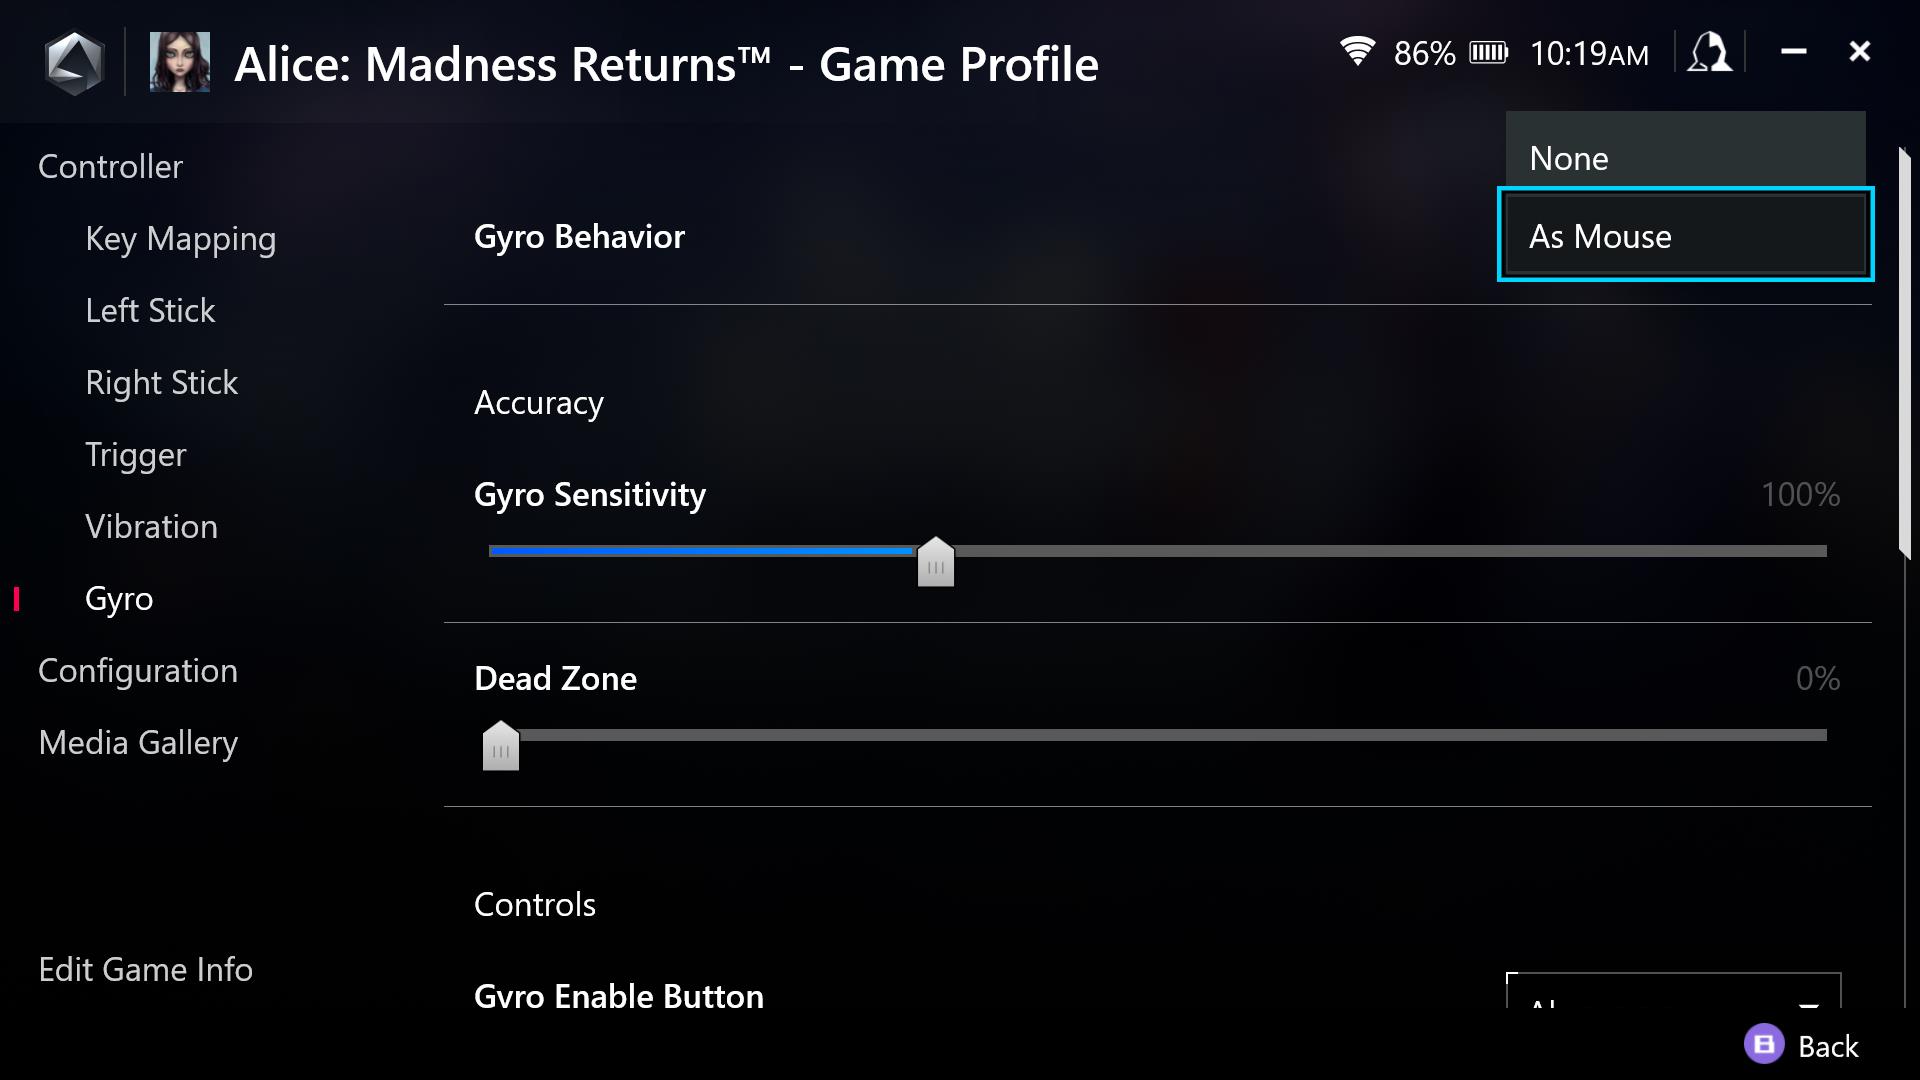
6. Parallel to the Gyro Behavior option it will say None. Select it and swap to As Mouse.
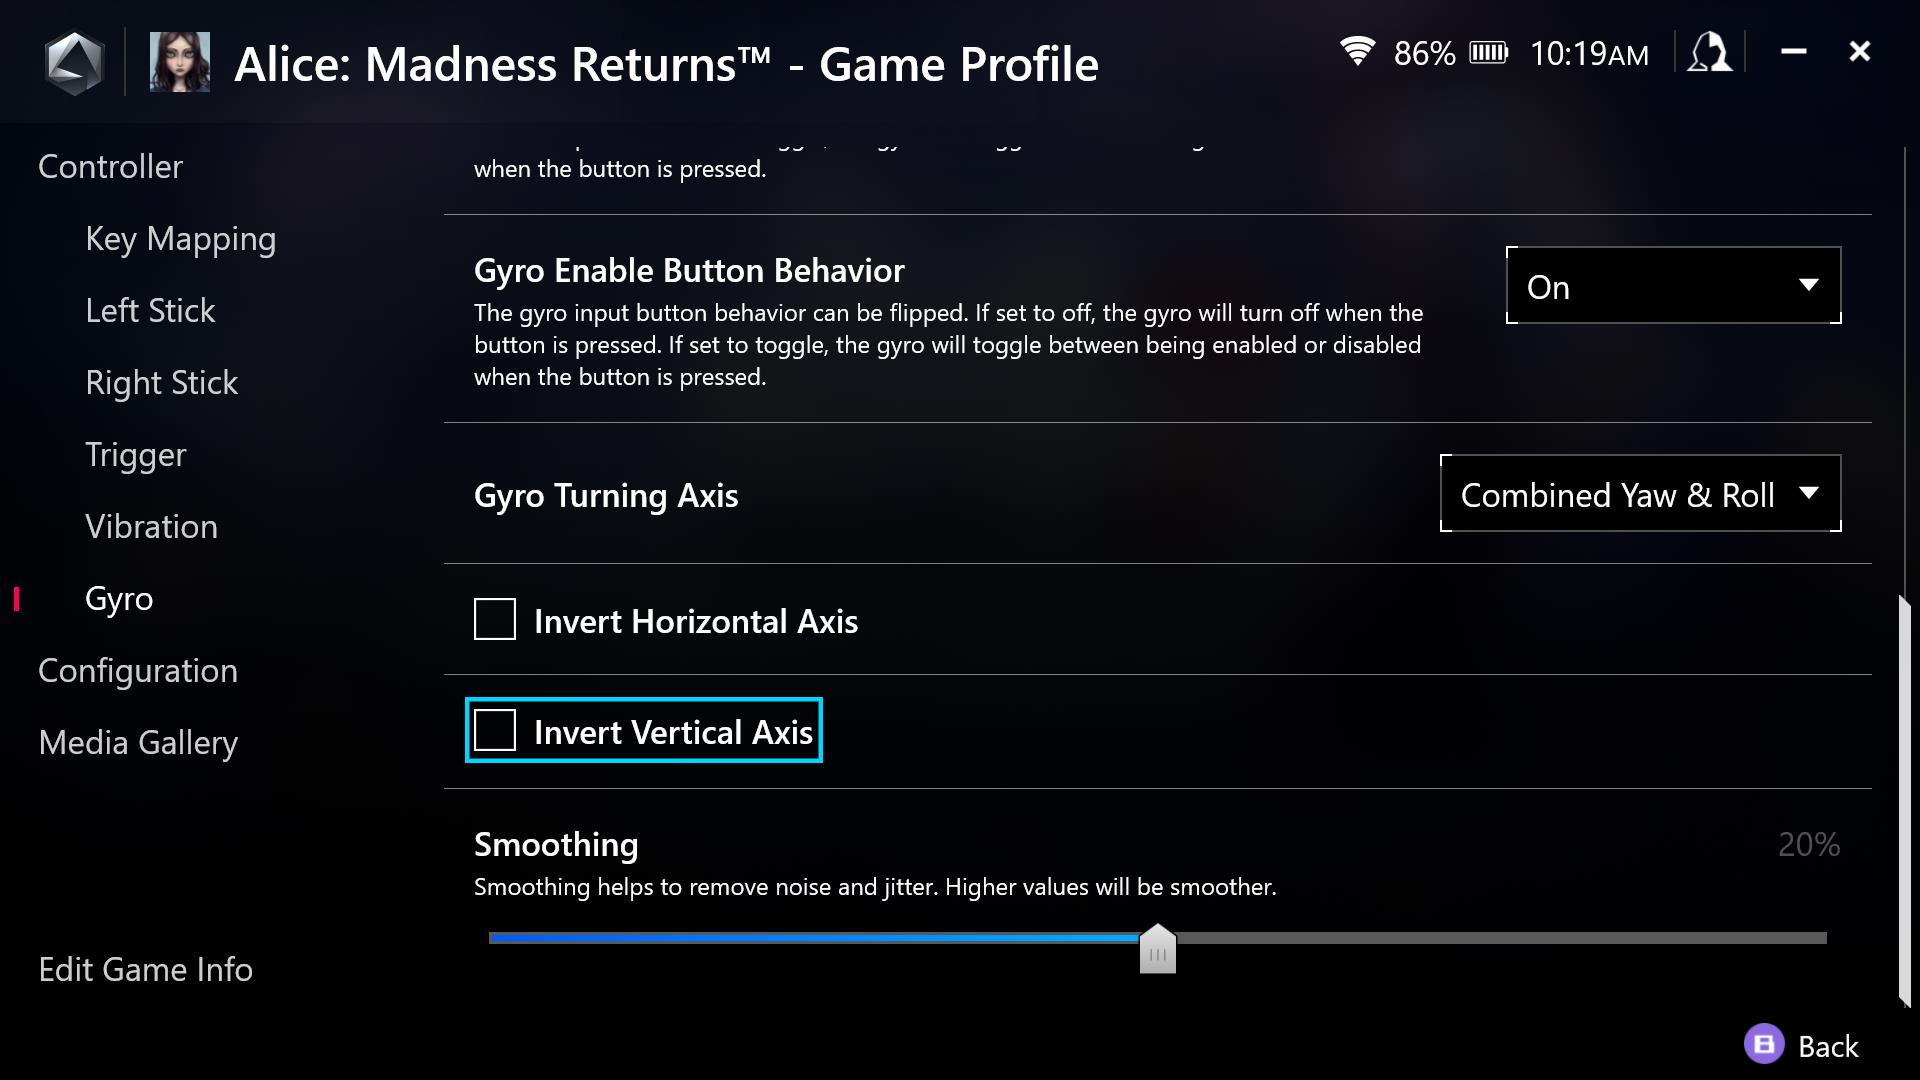
7. Feel free to adjust any other settings you might need for your Gyro aiming experience. I’ve personally had to modify the sensitivity a tad bit, as it was rather intense when I tested it on Alice: Madness Returns.
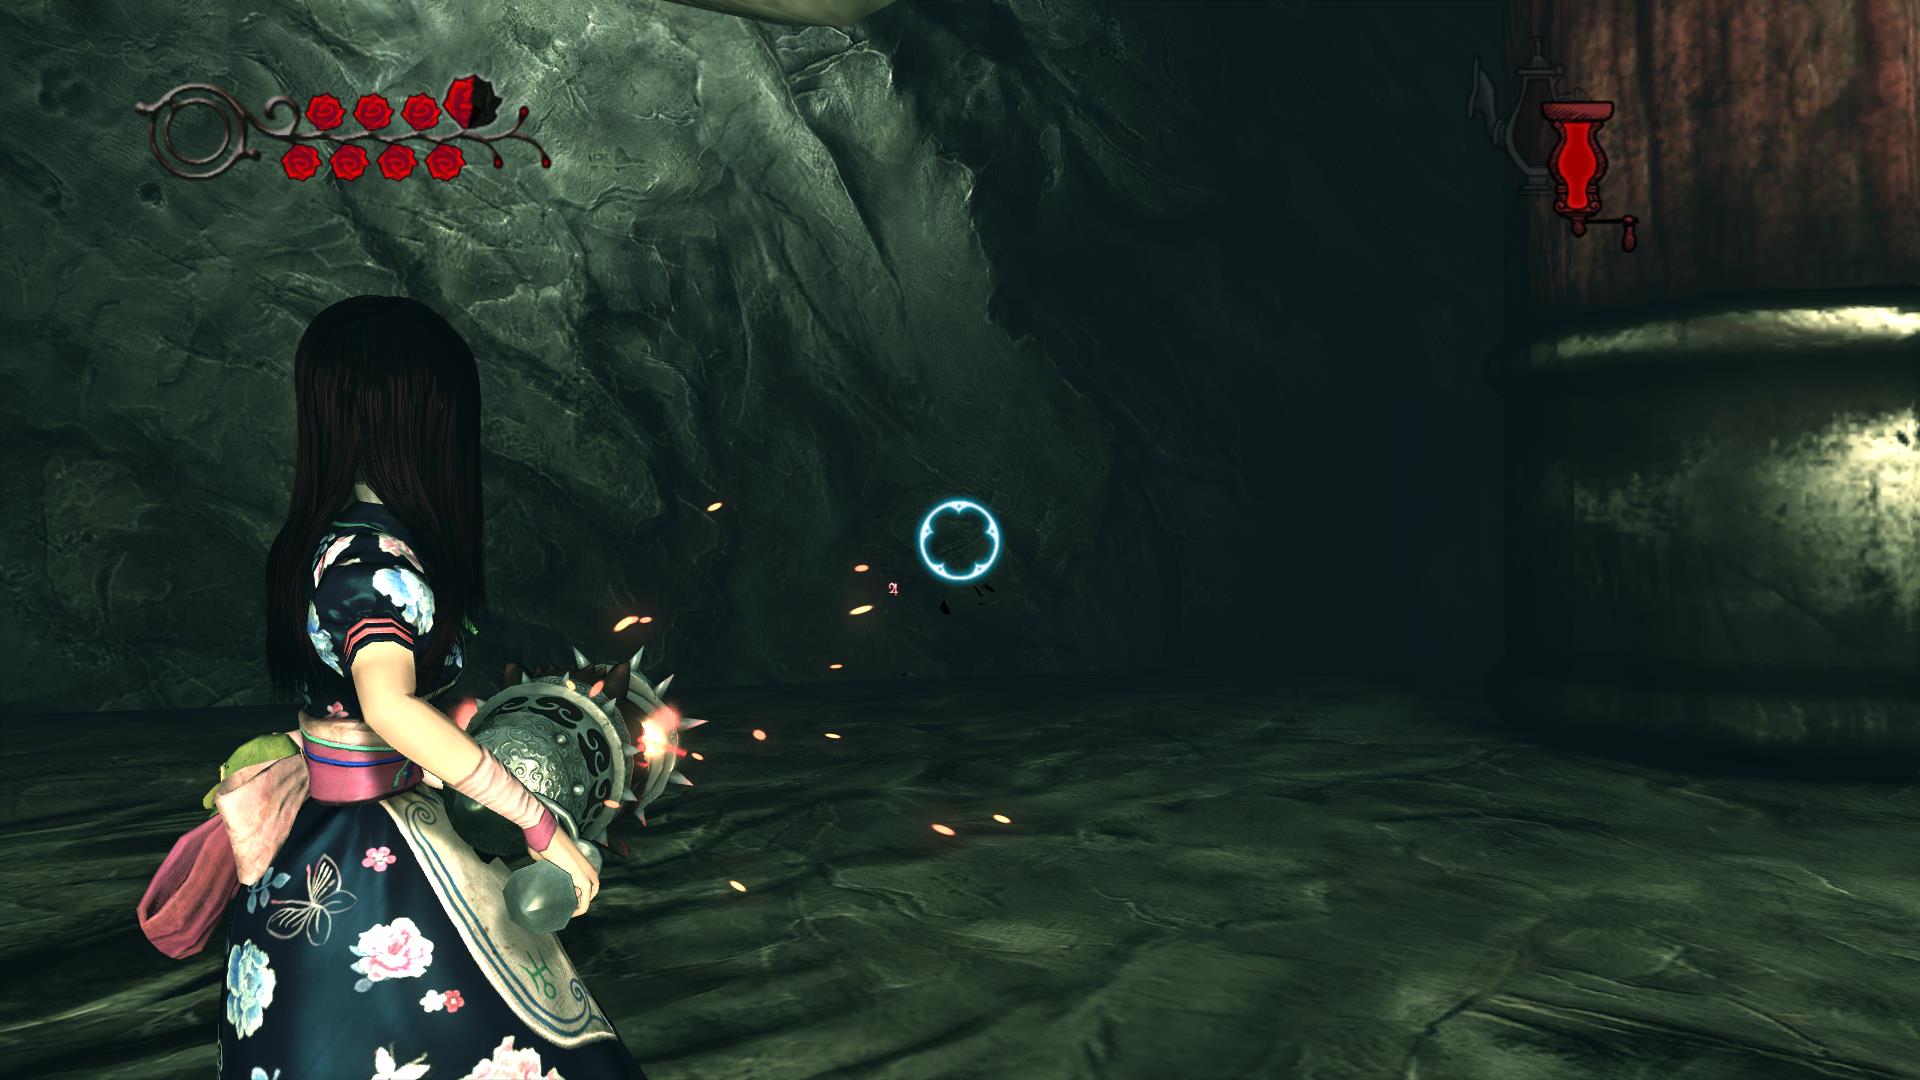
8. Simply launch your selected game and enjoy!
Source link
 notebook.co.id informasi dan review notebook laptop tablet dan pc