Whether you’re doing tutorials or you’re trying to nab those receipts, you can learn how to screen record on Mac very easily.
We also have a guide to screen record on iPhone and to share your screen via FaceTime on Mac. You can also see our latest MacBook Air 15 review if you’re looking to upgrade your setup.
Okay, now let’s jump into how to screen record on Mac.
How to screen record on Mac
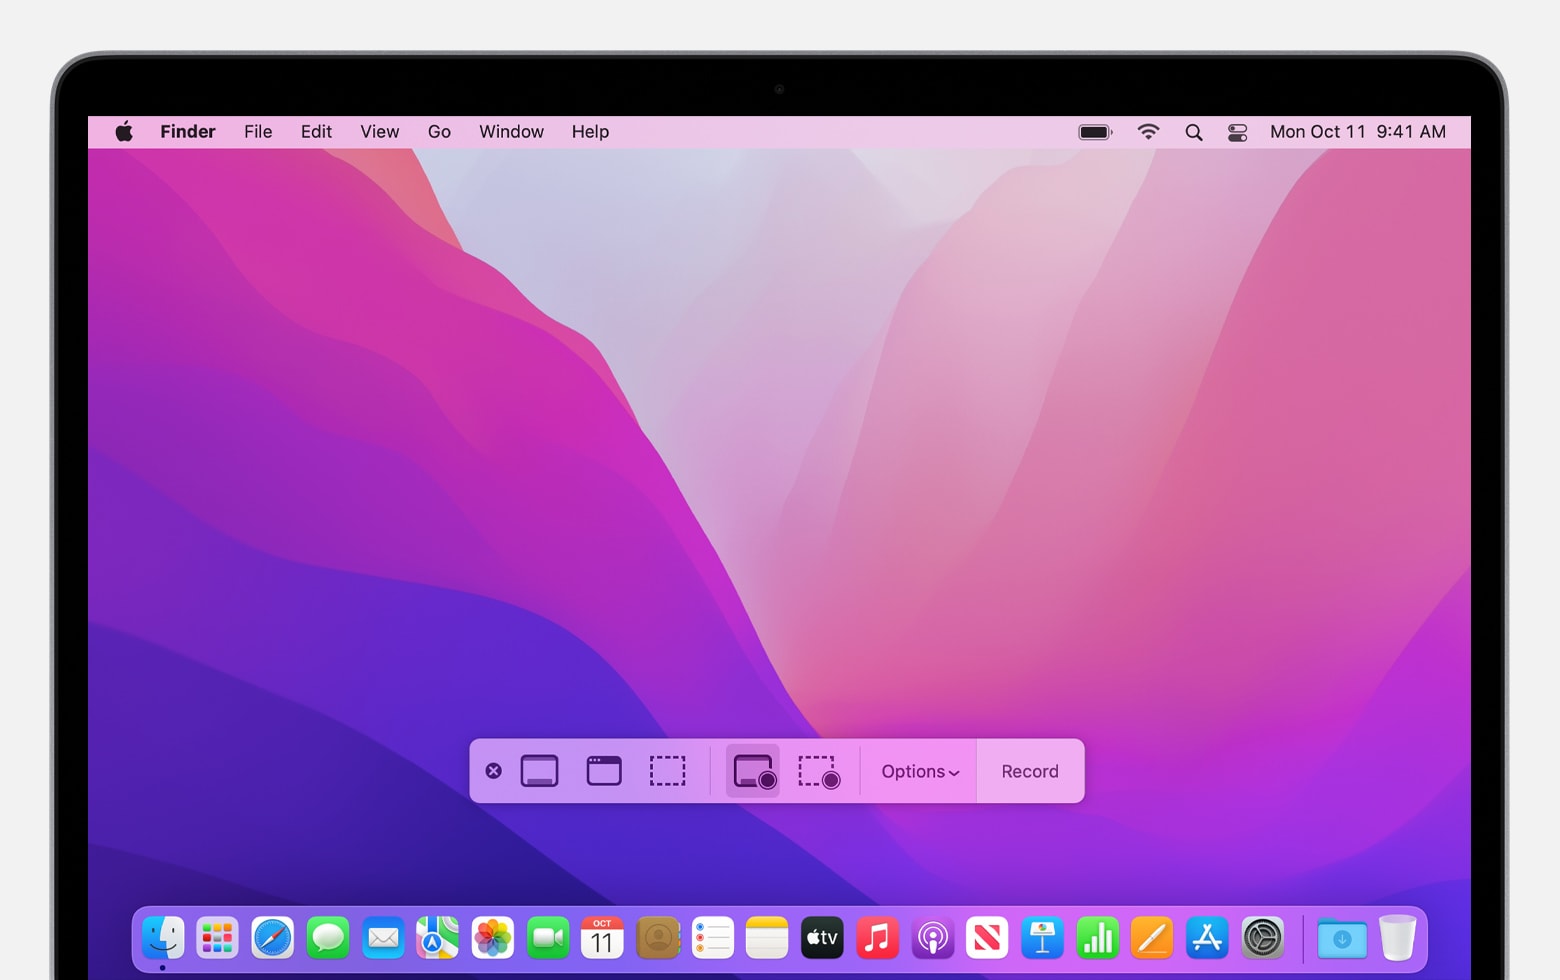
Step 1. The simplest way is to use the Screenshot toolbar, which you can activate by pressing Shift + Command + 5. You will see onscreen controls for recording the entire screen.

Step 2. To stop the recording, you can press Command + Control + Esc. The recording will automatically save to the Desktop.
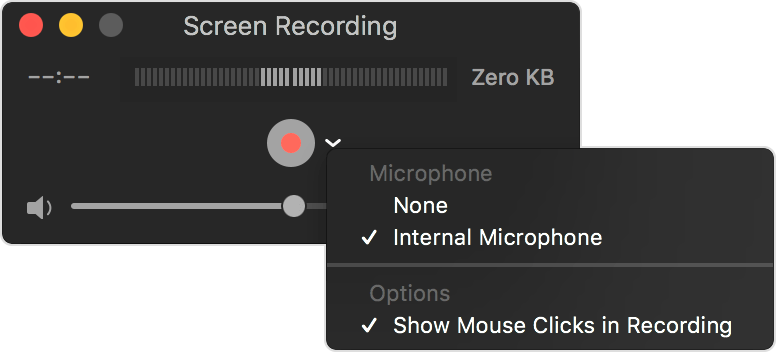
Step 3. If you don’t have macOS Mojave or later, you’ll have to resort to screen recording via the QuickTime Player. Go ahead and open the application.

Step 4. Choose File > New Screen Recording to get to the menu. Before you record, you can click the arrow next to the record button to change recording settings.
Step 5. Click the big ol’ Record button. And to stop recording, click the Stop button. The app will automatically open the recording after you’re done.
It’s as easy as that. Now go on and record your content. If you’re looking for more Mac tutorials, we’ve covered how to delete an app on Mac. And if you want to upgrade your software, take a look at our macOS Sonoma review.
Happy recording!
Source link
 notebook.co.id informasi dan review notebook laptop tablet dan pc